Windows VM Creator Script
ProxMenux provides automated scripts that create and configure Windows virtual machines on Proxmox VE. These scripts simplify the process by handling the necessary configurations and optimizations for Windows installations, including VirtIO drivers setup and TPM configuration.
Script Overview
The Windows VM creation script automates the process of setting up virtual machines optimized for running Windows operating systems. The script handles all aspects of VM configuration, including hardware allocation, disk setup, and boot options.
The script simplifies the VM creation process by offering the following options:
- Selection of default or advanced configuration
- Configuration of CPU, RAM, BIOS, and machine type
- Choice between virtual disk or physical disk passthrough
- Selection of disk interface type (SCSI, SATA, VirtIO, or IDE)
- Automatic configuration of EFI and TPM for secure boot
- Automatic VirtIO drivers setup for optimal performance
Default and Advanced Configuration
The script offers two configuration modes:
Default Configuration
If you select default configuration, the script will automatically apply the following values:
| Parameter | Default Value |
|---|---|
| Machine Type | q35 |
| BIOS Type | OVMF (UEFI) |
| CPU Type | Host |
| Core Count | 4 |
| RAM Size | 8192 MB |
| Bridge | vmbr0 |
| MAC Address | Automatically generated |
| TPM | Enabled (v2.0) |
| Start VM on Completion | No |
If you want to customize the configuration, select the Advanced Settings option in the menu.
Advanced Configuration
If you select advanced configuration, the script will allow you to customize each parameter:
| Parameter | Options |
|---|---|
| Machine Type | q35 or i440fx |
| BIOS Type | OVMF (UEFI) or SeaBIOS (Legacy) |
| CPU Type | Host or KVM64 |
| Core Count | Number of CPU cores |
| RAM Size | Amount of memory allocated to the VM |
| Bridge | Network bridge for connection |
| MAC Address | Custom MAC address |
| VLAN | VLAN tag (if used) |
| MTU | Maximum Transmission Unit size |
| TPM | Enable or disable TPM |
Disk Interface Selection
The script allows you to choose the disk interface type for both virtual and physical disks:
| Interface Type | Description | Best For |
|---|---|---|
| SCSI | Modern interface with good performance and features | Recommended for Windows 10/11 (includes discard/trim support) |
| SATA | Standard interface with high compatibility | Good general-purpose choice (includes discard/trim support) |
| VirtIO | Paravirtualized interface with highest performance | Advanced users seeking maximum performance (includes discard/trim support) |
| IDE | Legacy interface with maximum compatibility | Legacy Windows systems only (no discard/trim support) |
Disk Selection
Once the machine is configured, the script allows you to choose between two types of disks:
Virtual Disk
- The script lists the storage options available in Proxmox
- The user selects the disk and size in GB
- The virtual disk is automatically assigned to the VM using the selected interface type (SCSI, SATA, VirtIO, or IDE)
- Multiple disks can be added and will be assigned sequential device numbers (e.g., scsi0, scsi1, etc.)
Physical Disk Passthrough
- The script detects all available physical disks
- The user selects the physical disk or disks they want to use
- The physical disk is directly assigned to the VM via passthrough using the selected interface type (SCSI, SATA, VirtIO, or IDE)
- Multiple disks can be added and will be assigned sequential device numbers (e.g., scsi0, scsi1, etc.)
Additional Features
EFI Disk Configuration
When UEFI BIOS (OVMF) is selected, the script automatically configures an EFI system disk to ensure compatibility with modern bootloaders:
- You’ll be prompted to select the storage location for the EFI disk
- A 4MB EFI disk is created and attached to the VM
- The disk is formatted appropriately based on the selected storage backend (e.g., raw format for directory-based storage)
For Windows systems, a TPM 2.0 device is also added automatically to meet installation requirements for modern versions like Windows 11 and Windows Server 2022.
ISO Mounting
The script also handles ISO mounting automatically for both installation media and optional drivers:
- The main installation ISO is mounted to the first available IDE slot (typically
ide2) - If the system is Windows, the VirtIO drivers ISO is downloaded and mounted to the next IDE slot (typically
ide3)
QEMU Guest Agent
The script automatically configures QEMU Guest Agent support:
- Enables the QEMU Guest Agent in the VM configuration
- Sets up the necessary communication channel
- Provides instructions for installing the guest agent inside the VM after installation
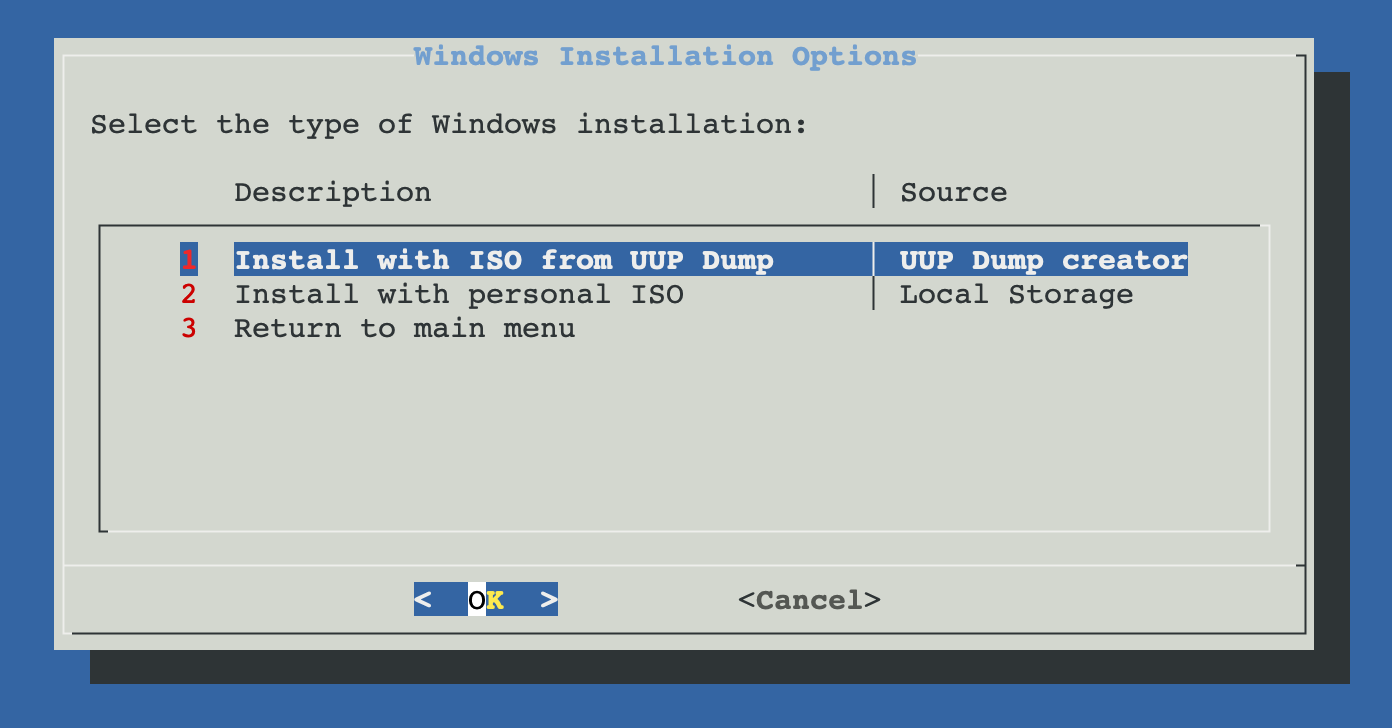
Windows Installation Options
ProxMenux offers two methods for installing Windows on your virtual machine:
Script UUP Dump ISO Creator
The UUP Dump ISO Creator script is a utility included in ProxMenux that allows you to download and create Windows installation media directly from Microsoft's Windows Update servers. This option provides access to the latest Windows builds, including Insider Preview versions.
Features:
- Access to the latest Windows builds
- Ability to download Insider Preview versions
- Clean, official Microsoft installation files
- Automatic ISO creation and mounting
- Support for various Windows editions (Home, Pro, Enterprise)
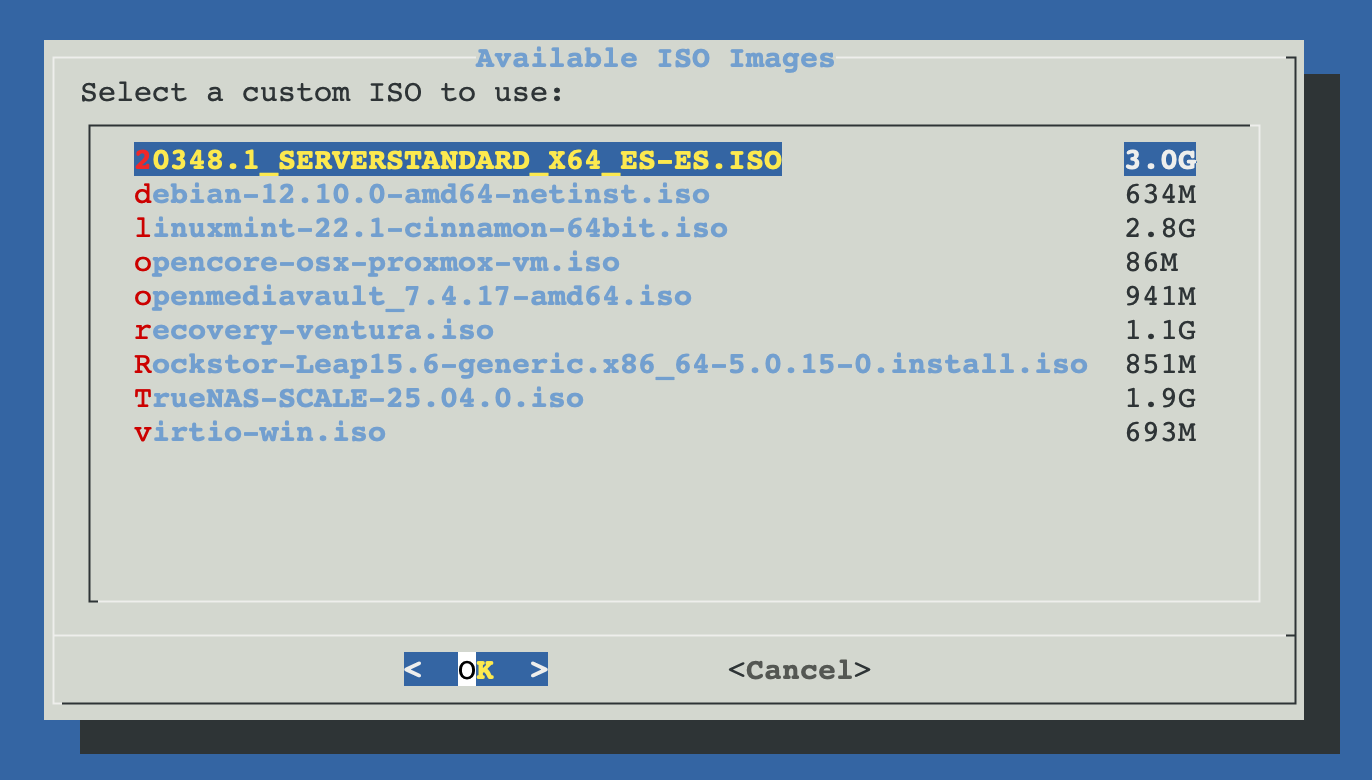
Install with Local ISO
This option allows you to use your own Windows ISO file that's already uploaded to your Proxmox server's local storage. Ideal if you have custom or specific Windows installation media.
Installation Process
After configuring the VM settings and selecting your installation method, the script will:
- Create the VM with the specified configuration
- Configure EFI disk and TPM for secure boot support
- Create and attach virtual disks or pass through physical disks
- Download and mount the Windows ISO (UUP Dump option) or mount your local ISO
- Download and mount the VirtIO drivers ISO
- Set the boot order (disk first, then ISO)
- Configure the QEMU Guest Agent
- Start the VM if requested
VirtIO Drivers Setup
For optimal performance, Windows VMs require VirtIO drivers. The script automatically handles this by:
- Downloading the latest VirtIO drivers ISO or using an existing one
- Mounting the VirtIO drivers ISO to the VM
- Providing instructions for loading the drivers during Windows installation
If you select a SCSI or VirtIO disk interface for the virtual machine, Windows installation will not detect the disk by default. In this case, you must click "Load Driver" during the disk selection step and browse to the mounted VirtIO ISO to install the necessary storage drivers.
These interfaces offer significantly better performance compared to traditional SATA disks, and are therefore recommended for optimal disk I/O.
Tips
- If you select VirtIO as the network interface (recommended for performance), you must also install the VirtIO network drivers from the same ISO. This ensures that the Windows installer can access the network to complete updates or activate the system.
Important:
Without the VirtIO network driver, the virtual machine will not have internet access during installation, which may prevent Windows from completing activation or downloading necessary updates.
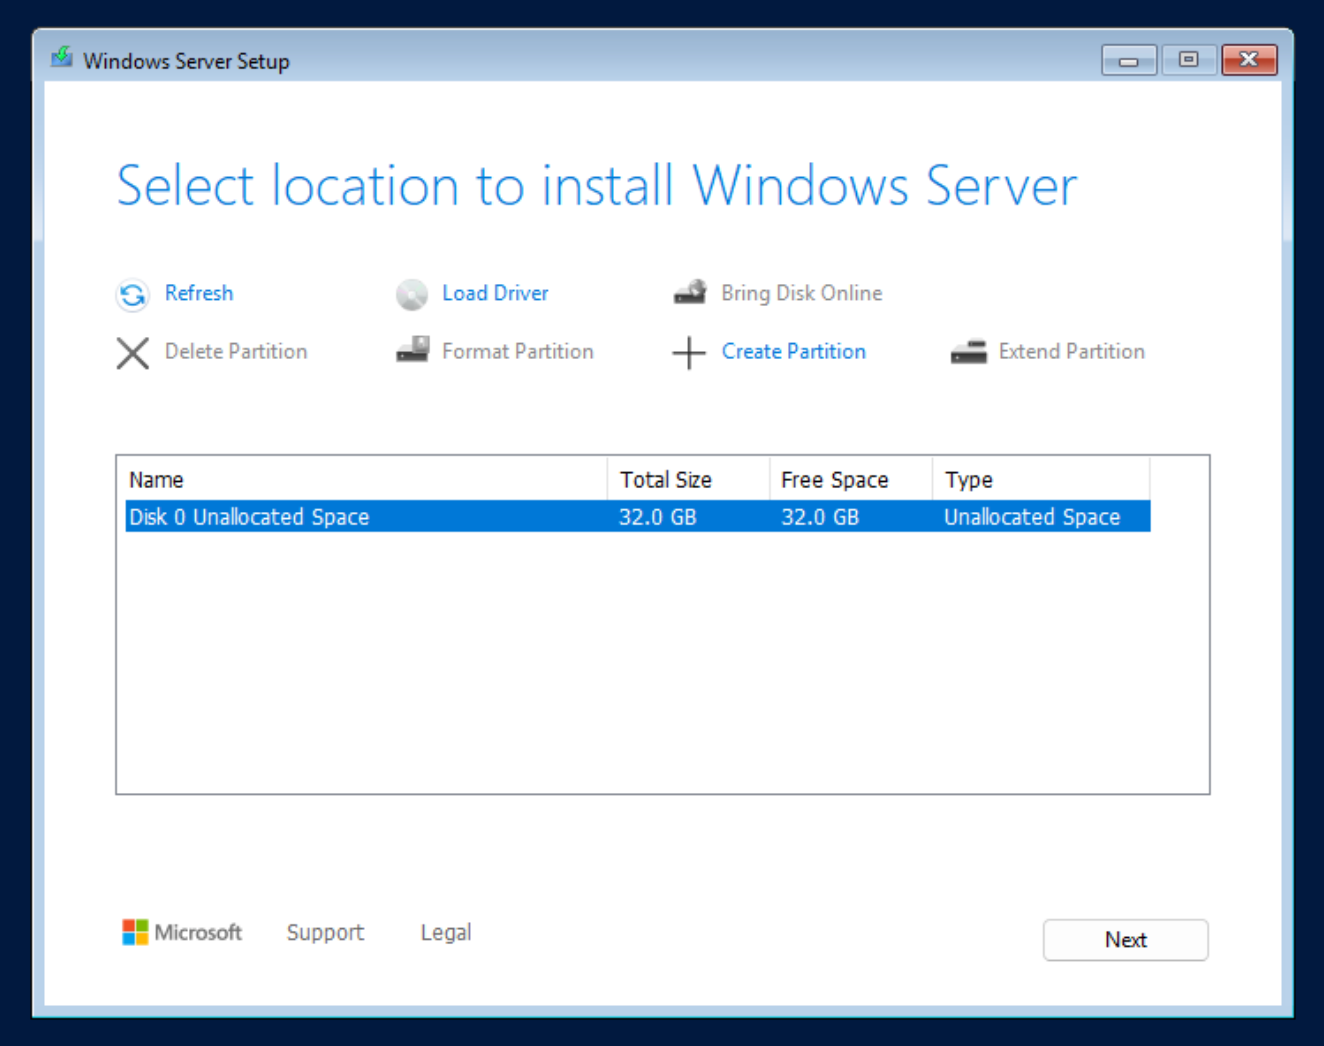
Step 1: Access the "Where do you want to install Windows?" screen
During Windows installation, if no disks are shown on the “Where do you want to install Windows?” screen, it means the required storage drivers for your selected disk interface (such as SCSI or VirtIO) are not available. You'll need to load them manually.
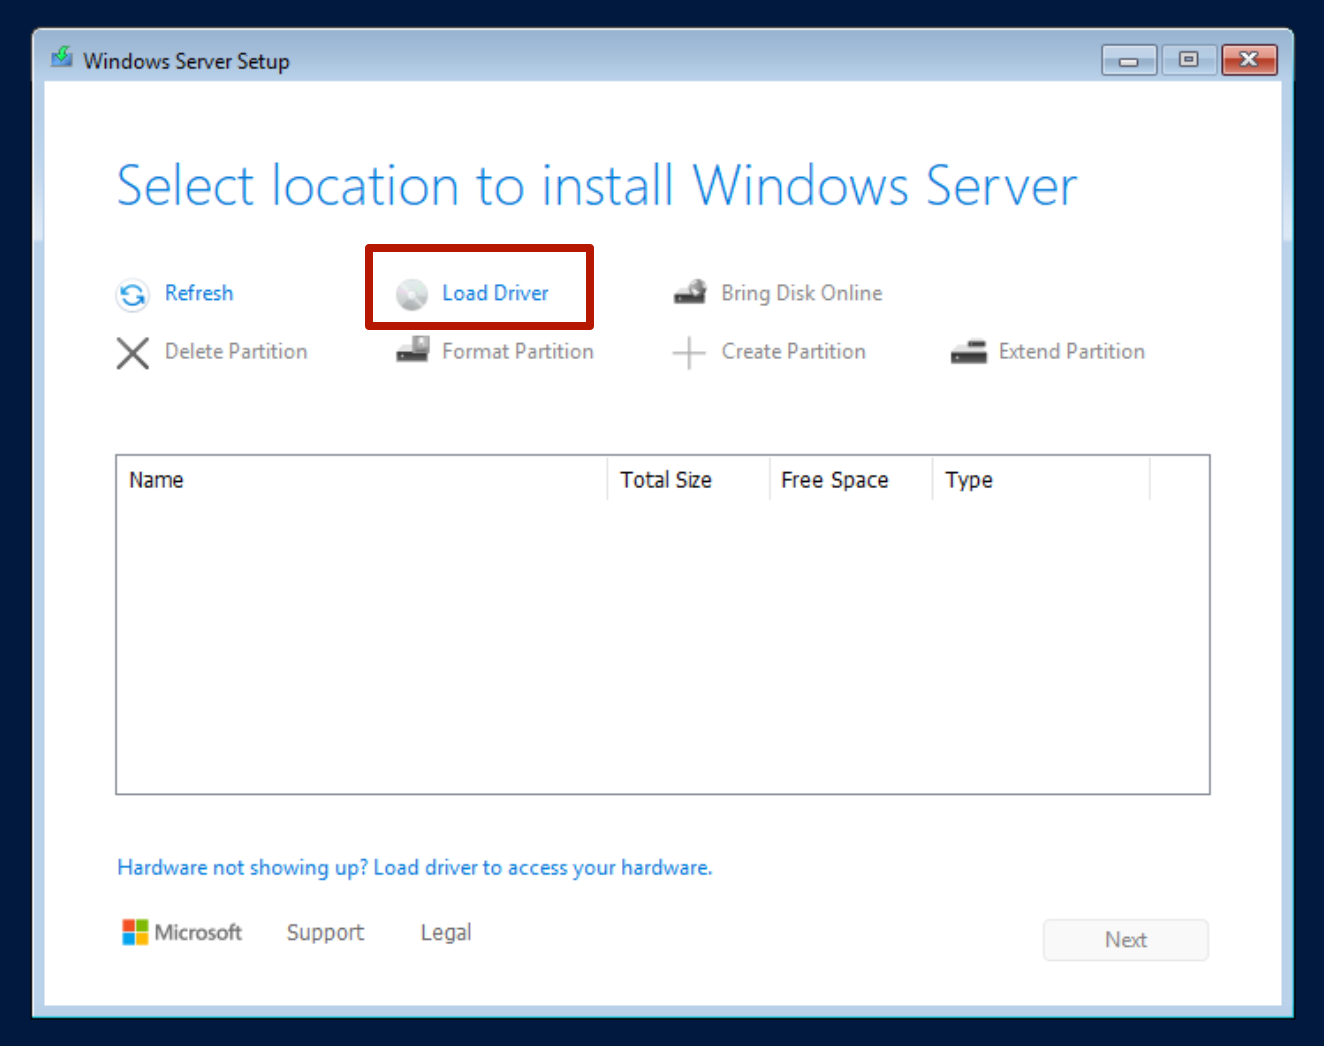
Step 2: Click "Load driver"
Click the “Load driver” button to browse the mounted VirtIO ISO. This will allow you to load the necessary storage drivers so Windows can detect the virtual disk.
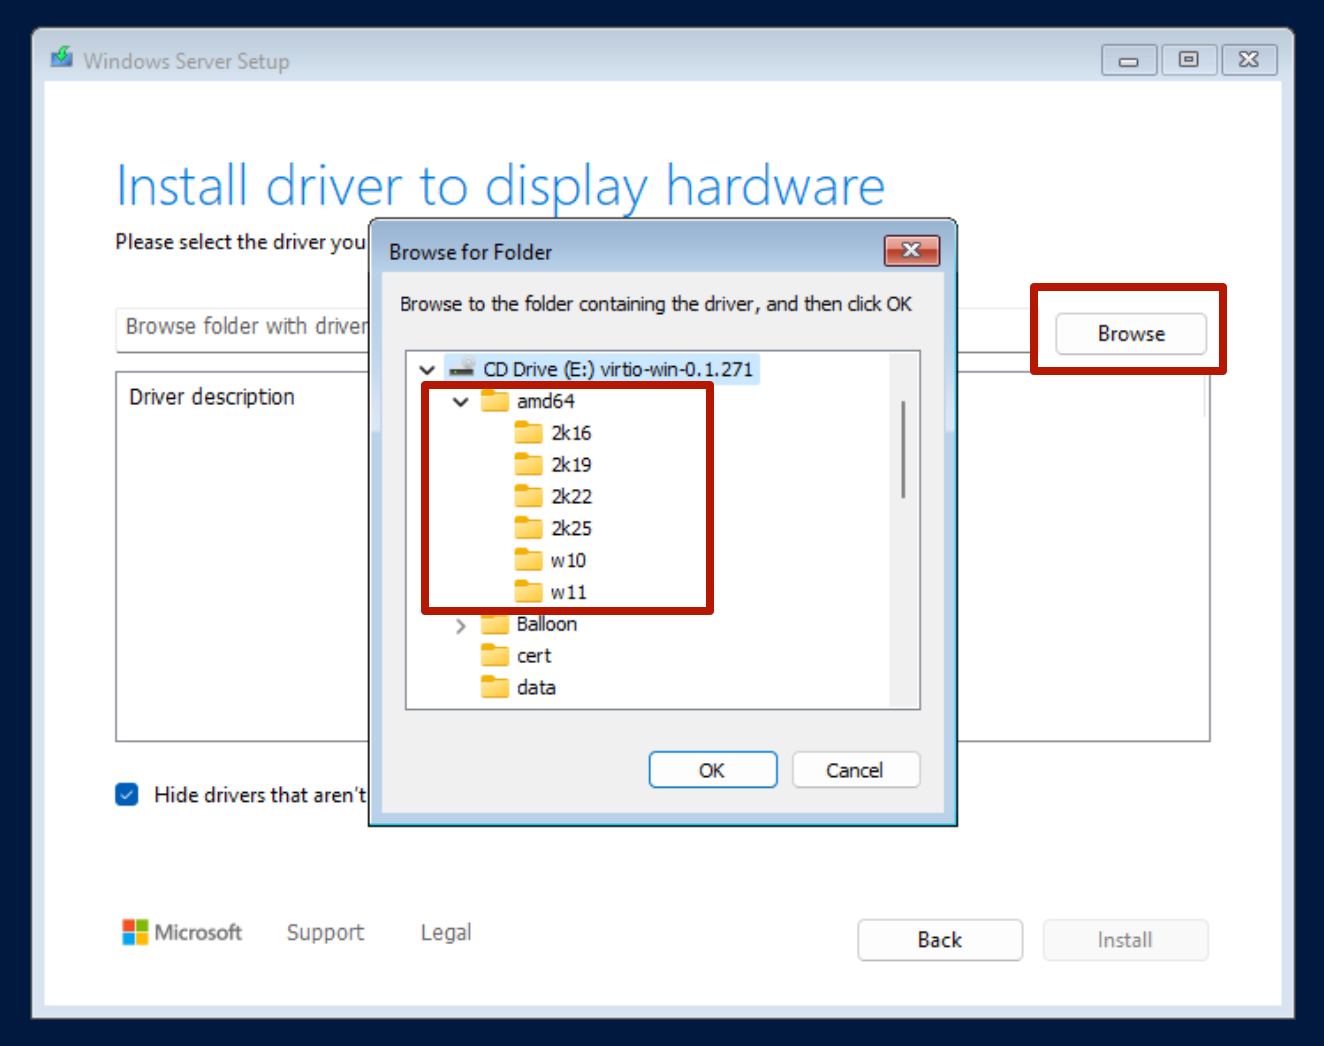
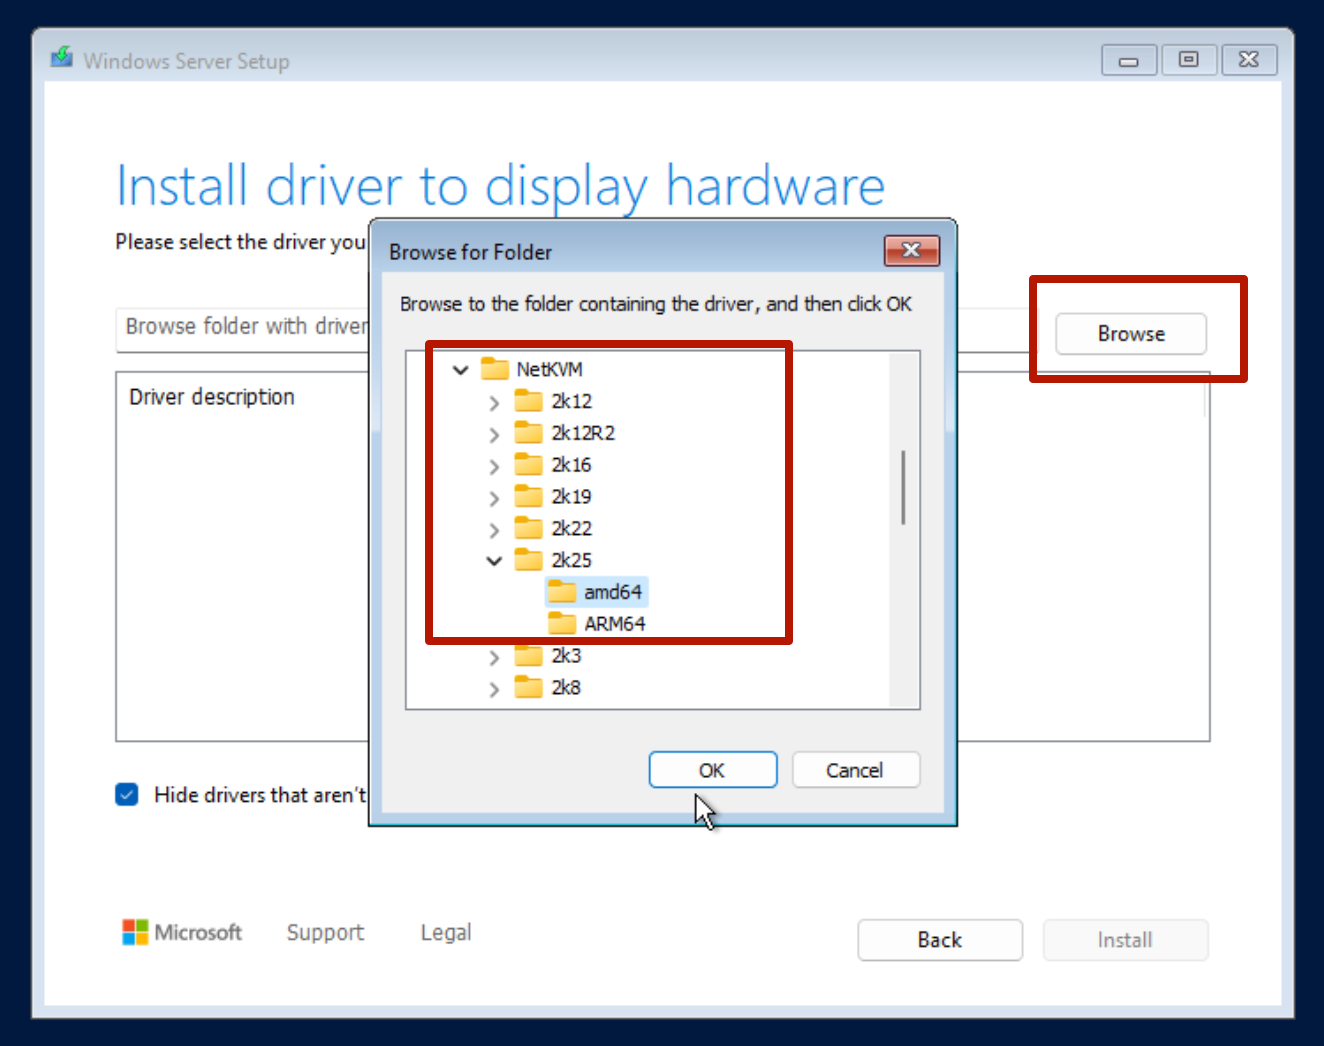
Step 3: Browse to the correct driver location
On the mounted VirtIO ISO, navigate to the appropriate driver folder that matches your selected disk interface and Windows version. For example, the viostor folder contains storage drivers, and you'll find subfolders organized by version (e.g., Windows 10, 11, Server).
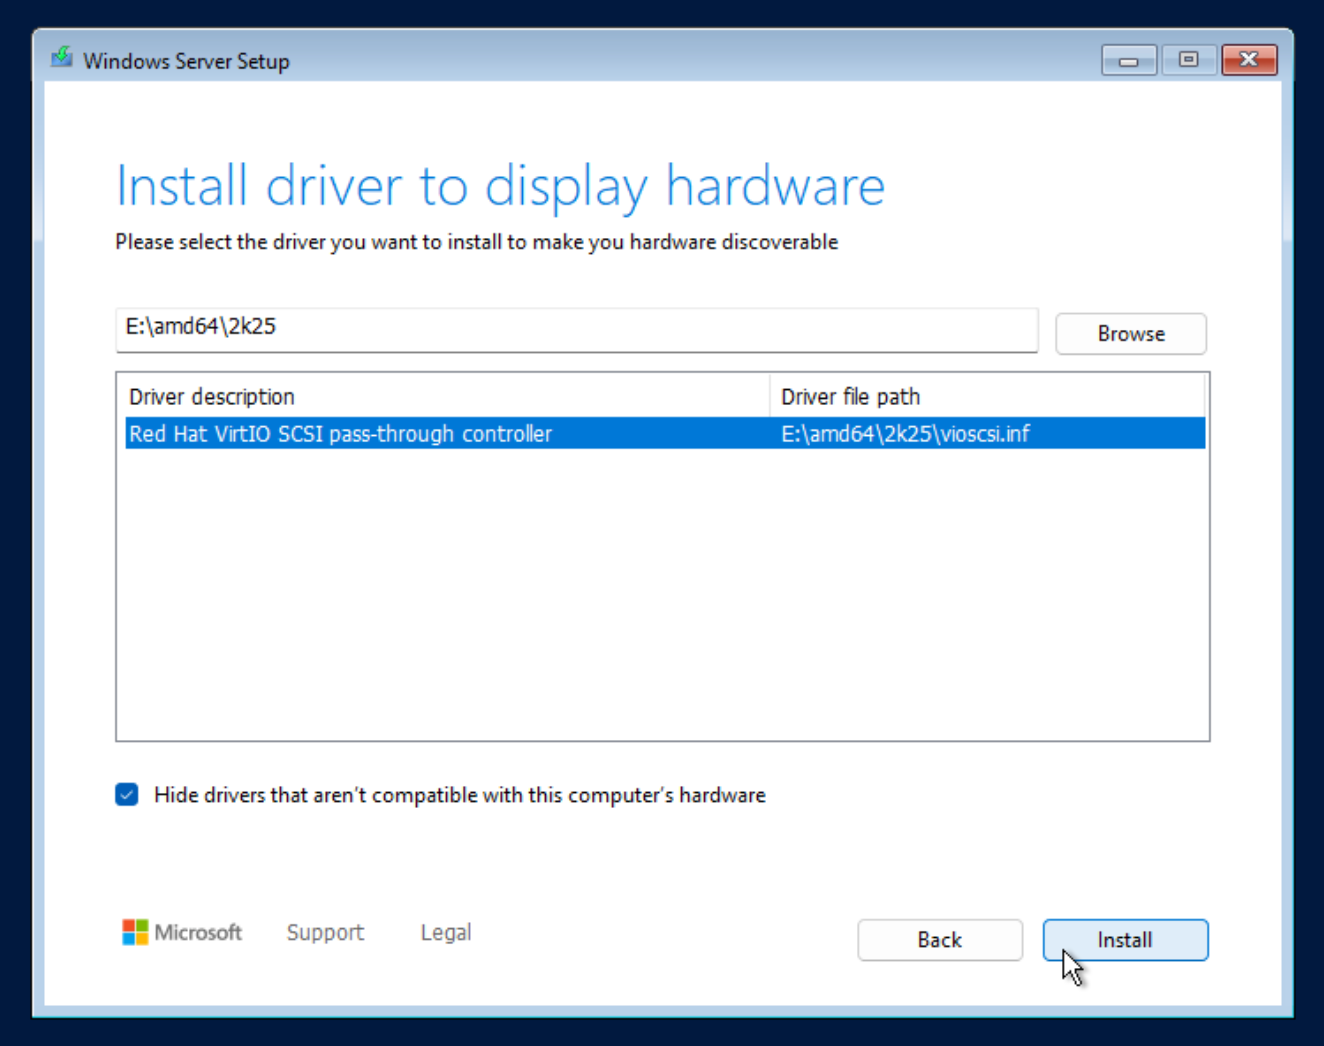
Step 4: Select the appropriate driver
After selecting the folder, Windows will list the available drivers. Choose the appropriate one — usually “Red Hat VirtIO SCSI controller” — and click “Next” to proceed with the installation.
Step 5: Install network drivers (recommended)
Pro Tip: If you selected VirtIO as the network interface, Windows will not recognize it by default. To enable internet access during installation, load the VirtIO network driver from the ISO by browsing to the NetKVM folder and selecting the correct subfolder for your Windows version.
Post-Installation Driver Setup
After the Windows installation is complete, it's recommended to install the remaining VirtIO drivers for full hardware support and optimal performance. To do this, open the mounted VirtIO ISO in File Explorer and run the installer named virtio-win-guest-tools.exe. This will install drivers for network, display, input, ballooning, and other virtualized components.